Category Archives: Open source

Software KVM with inexpensive hardware

This is a software KVM (keyboard, video, mouse) project that uses inexpensive off-the-shelf components. This lets you control a PC or Raspberry PI (aka guest) without needing a second keyboard, mouse, and monitor. You will need a Windows PC (aka host) with two USB ports or a USB hub if you only have one port available. The project with all the source code can be found at GitHub: https://github.com/alpharesearch/KeyboardAndMouseControl

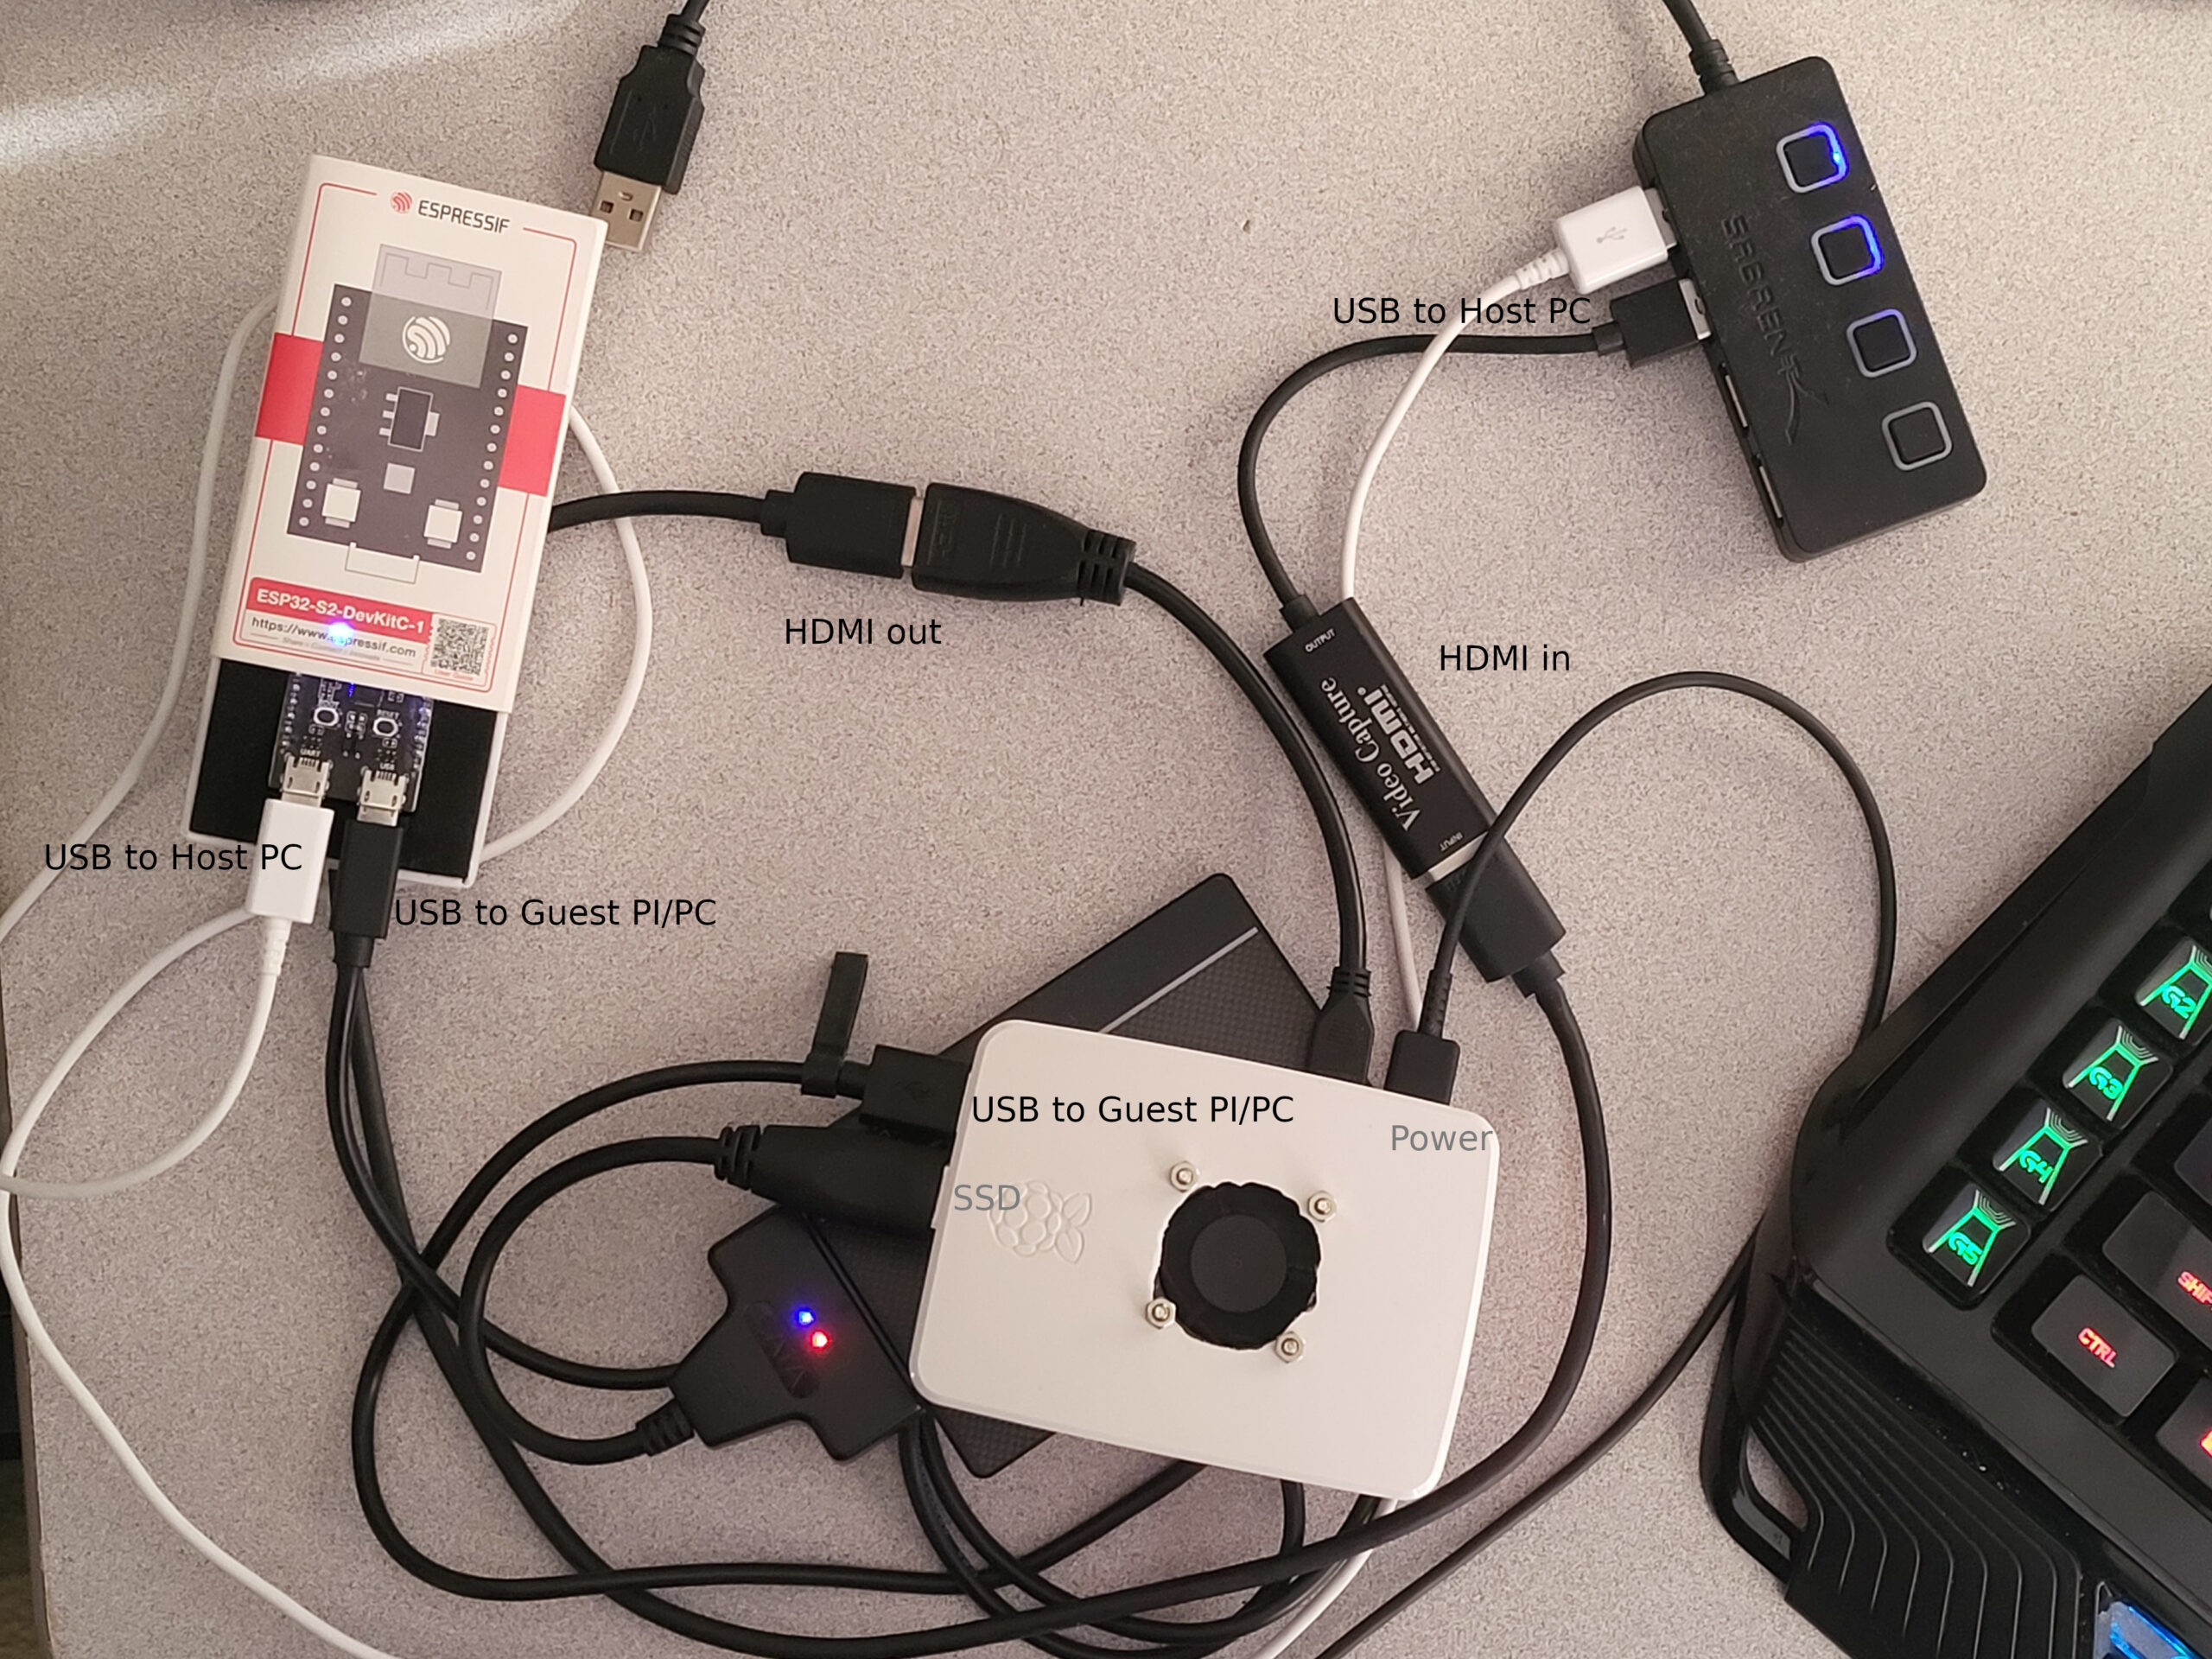
You need to get two pieces of hardware: a microcontroller with two USB ports and an HDMI capture USB dongle that works with VLC direct show capture.

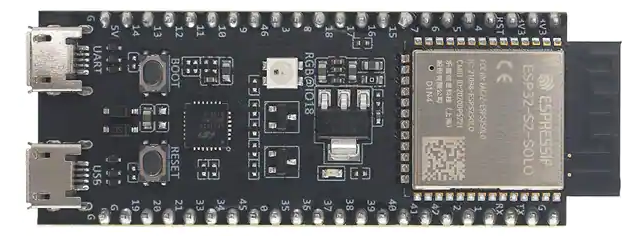
I’m using an ESP32-S2-DEVKITC-1, but there are many different other choices:
https://www.digikey.com/short/rm80t4z3

You can find USB 3 HDMI capture dongles at Amazon:
https://amzn.to/3CavHh1 (paid link)
or https://amzn.to/3GjZarp (paid link)
As an Amazon Associate, I earn from qualifying purchases.

You can also donate directly to me, thank you for your support.

After you load the Arduino sketch to the microcontroller you are able to send the keyboard and mouse inputs from the host to the guest via serial communication. I selected the Espressif ESP32-S2-DevKitC-1 because it has two USB ports. But any microcontroller that can be made to work with a serial port on one USB port and a HID keyboard and mouse port on another USB port should work. I used Arduino 1.8.16, under Linux the compilation is very fast, but under Windows not so much. At this point in time, to get the S2 working I had to install the ESP32 beta V2.0 board version.

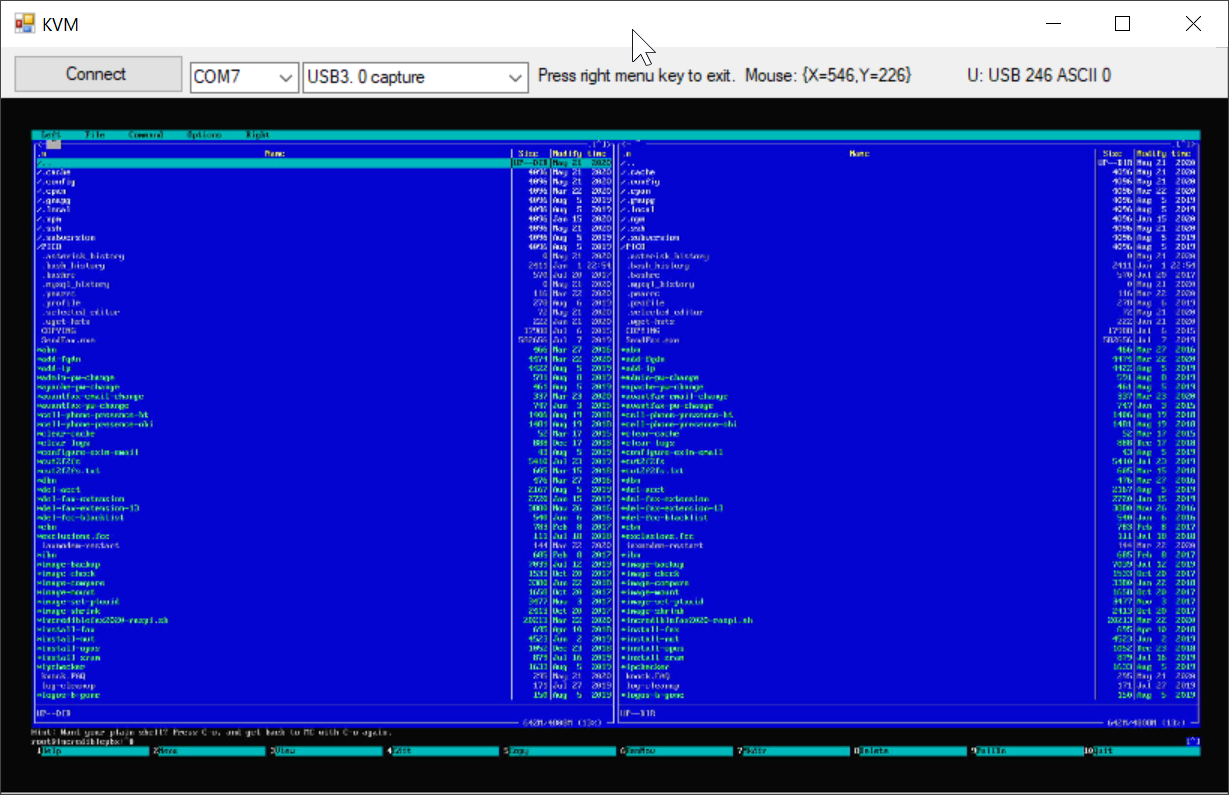
The KVM program does the rest, like showing the video and sending the mouse and keyboard over serial accordingly. I started to program the software under SharpDevelop (RIP), but I had to move to Visual Studio 2019 to download all the dependents (like libVLCsharp) via NuGet. The compiled version is available as a download on GitHub.

To use the system just connect the UART USB and USB portion of the USB HDMI dongle to the host and connect the HID USB and the HDMI portion of the USB HDMI dongle to the guest.

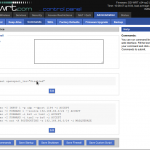
Start the program, resize the window, select the com port, select the USB video device, and press connect button. The ‘menu’ key (it’s left next to the right CTRL key) releases the mouse and keyboard from the KVM window or you can just press ALT + F4 to close the program.

Test GUI for Grbl without Arduino using the Simulator and virtual com port under GNU Linux.

My Arduino is not accabale right now but I wanted to look at a new GUI or gcode sender program for Grbl called SourceRabbit GCode Sender. I already had the simulator compiled and ready to go and the next step was just to find a way to connect both together. I found that the program socat can do just this:

socat -d -d pty,raw,echo=0,link=/tmp/ttyV0 pty,raw,echo=0,link=/tmp/ttyV1

This creates two virtual serial ports with the names /tmp/ttyV0 and /tmp/ttyV1 and connect both together. Now I just need to direct the output and input of Grbl to one of the virtual serial ports:

./grbl_sim -n > /tmp/ttyV0 < /tmp/ttyV0

To test if this works I can use a command line terminal program like miniterm and connect to the other virtual serial port

miniterm.py /tmp/ttyV1

Now that everything is working I can finally test the new SourceRabbit GCode Sender program.

Grbl 0.9g settings for my Shapeoko

shapeoko

>>> $$
$0=10 (step pulse, usec)
$1=25 (step idle delay, msec)
$2=0 (step port invert mask:00000000)
$3=2 (dir port invert mask:00000010)
$4=0 (step enable invert, bool)
$5=0 (limit pins invert, bool)
$6=0 (probe pin invert, bool)
$10=3 (status report mask:00000011)
$11=0.050 (junction deviation, mm)
$12=0.002 (arc tolerance, mm)
$13=0 (report inches, bool)
$14=1 (auto start, bool)
$20=1 (soft limits, bool)
$21=0 (hard limits, bool)
$22=1 (homing cycle, bool)
$23=1 (homing dir invert mask:00000001)
$24=25.000 (homing feed, mm/min)
$25=250.000 (homing seek, mm/min)
$26=250 (homing debounce, msec)
$27=3.000 (homing pull-off, mm)
$100=87.489 (x, step/mm)
$101=87.489 (y, step/mm)
$102=640.000 (z, step/mm)
$110=4000.000 (x max rate, mm/min)
$111=4000.000 (y max rate, mm/min)
$112=650.000 (z max rate, mm/min)
$120=15.000 (x accel, mm/sec^2)
$121=15.000 (y accel, mm/sec^2)
$122=15.000 (z accel, mm/sec^2)
$130=204.000 (x max travel, mm)
$131=204.000 (y max travel, mm)
$132=54.000 (z max travel, mm)
ok

DD WRT OPENVPN setup for Firmware: DD-WRT v24-sp2 (03/25/13) mega

This is how I configured OPEN VPN on my DD WRT router:

All the key generation tutorials are still good, but with the new firmware most of the settings are now in GUI:


Internal local IP range: 192.168.0.0/24
VPN IP range 192.168.66.0/24

DNS extra settings:
interface=tun2

settings

push "route 192.168.0.0 255.255.255.0"
push "dhcp-option DNS 192.168.66.1"
push "comp-lzo no"

fire wall rules:

iptables -I INPUT 1 -p udp --dport 1194 -j ACCEPT
iptables -I FORWARD 1 --source 192.168.66.0/24 -j ACCEPT
iptables -I FORWARD -i br0 -o tun2 -j ACCEPT
iptables -I FORWARD -i tun2 -o br0 -j ACCEPT
iptables -t nat -A POSTROUTING -s 192.168.66.0/24 -j MASQUERADE

Client File, like client1.ovpn:

remote xxx.dyndns.org 1194
client
remote-cert-tls server
dev tun0
proto udp
resolv-retry infinite
nobind
persist-key
persist-tun
float

-----BEGIN CERTIFICATE-----
SECRET blablabla
-----END CERTIFICATE-----

-----BEGIN CERTIFICATE-----
SECRET blablabla
-----END CERTIFICATE-----

-----BEGIN PRIVATE KEY-----
SECRET blablabla
-----END PRIVATE KEY-----


New Robocut 1.0.7 released.

I just released a new version of Robocut with just some minor changes. A user informed me that his plotter used the USB ID 111C. So I hard coded this ID in the program as well. Please send me an email if there are other IDs that are not in by default. There is a test that can be done to check if the new ID works first. Just convert the ID from hex (111e) to dec (4382) and start robocut like this:

robocut –usb-product-id 4382

If the new hardware works let me know and I will add it to the program.