Category Archives: Stuff

Software KVM with inexpensive hardware

This is a software KVM (keyboard, video, mouse) project that uses inexpensive off-the-shelf components. This lets you control a PC or Raspberry PI (aka guest) without needing a second keyboard, mouse, and monitor. You will need a Windows PC (aka host) with two USB ports or a USB hub if you only have one port available. The project with all the source code can be found at GitHub: https://github.com/alpharesearch/KeyboardAndMouseControl

You need to get two pieces of hardware: a microcontroller with two USB ports and an HDMI capture USB dongle that works with VLC direct show capture.

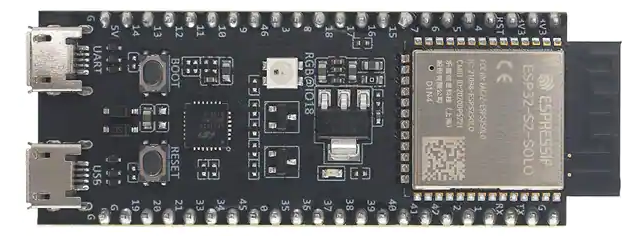
I’m using an ESP32-S2-DEVKITC-1, but there are many different other choices:
https://www.digikey.com/short/rm80t4z3
You can find USB 3 HDMI capture dongles at Amazon:
https://amzn.to/3CavHh1 (paid link)
or https://amzn.to/3GjZarp (paid link)
As an Amazon Associate, I earn from qualifying purchases.

You can also donate directly to me, thank you for your support.

After you load the Arduino sketch to the microcontroller you are able to send the keyboard and mouse inputs from the host to the guest via serial communication. I selected the Espressif ESP32-S2-DevKitC-1 because it has two USB ports. But any microcontroller that can be made to work with a serial port on one USB port and a HID keyboard and mouse port on another USB port should work. I used Arduino 1.8.16, under Linux the compilation is very fast, but under Windows not so much. At this point in time, to get the S2 working I had to install the ESP32 beta V2.0 board version.

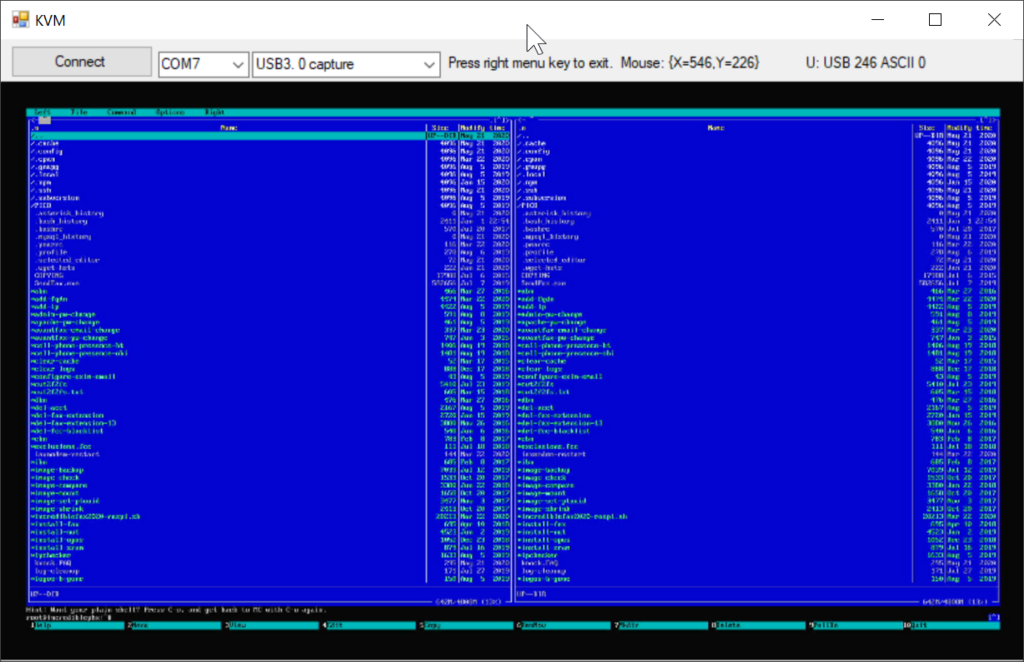
The KVM program does the rest, like showing the video and sending the mouse and keyboard over serial accordingly. I started to program the software under SharpDevelop (RIP), but I had to move to Visual Studio 2019 to download all the dependents (like libVLCsharp) via NuGet. The compiled version is available as a download on GitHub.

To use the system just connect the UART USB and USB portion of the USB HDMI dongle to the host and connect the HID USB and the HDMI portion of the USB HDMI dongle to the guest.
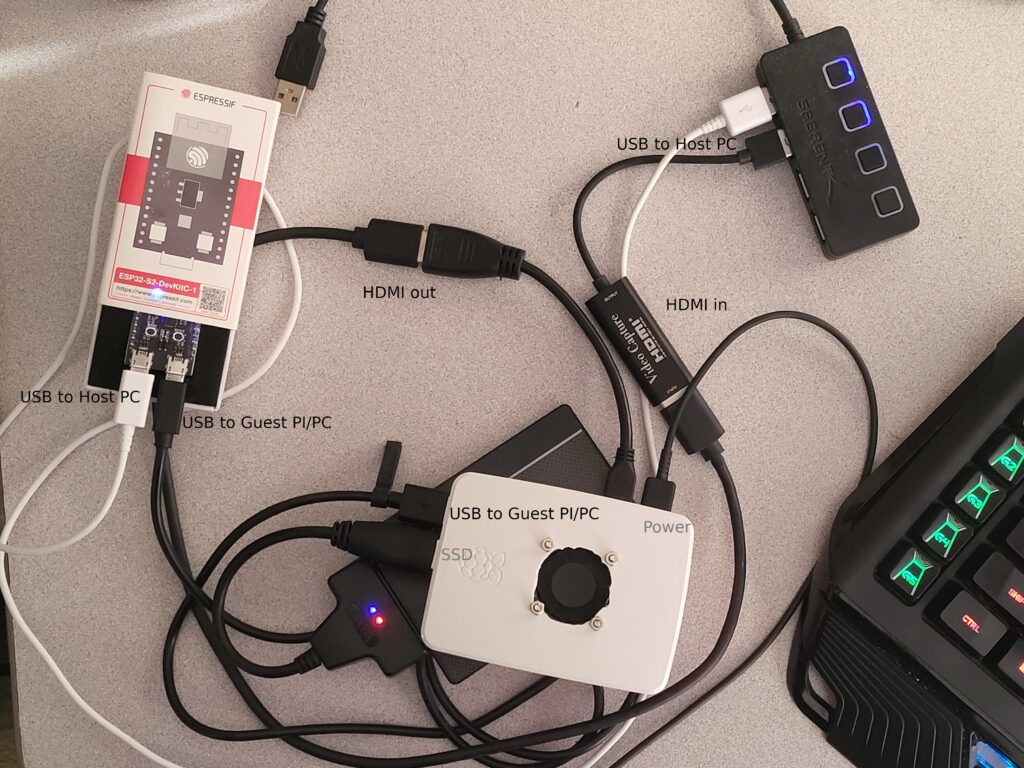
Start the program, resize the window, select the com port, select the USB video device, and press connect button. The ‘menu’ key (it’s left next to the right CTRL key) releases the mouse and keyboard from the KVM window or you can just press ALT + F4 to close the program.
low carb hazelnut spread

Case study, Nutella supposedly is made up of:

55%sugar
16%oil
13%hazelnut
7.8%milk
7.4%cocao power

Low carb alternative could be:

8ozlow carb chocolate
16ozhazelnut
8oz ghee
3ozbutter power
8ozcocoa power
12ozallulose or erythritol (maybe a little stevia to taste)
12glecithin
2-5gdry or oil-based vanilla flavor, pinch vanillin

You can not add any water or alcohol based liquids (like vanilla extract) to this or it will seize!

I normally lightly roast the hazelnuts to dry out any water and bring out the flavor.

A malanger is a must to grind down everything. Make sure all the ingredients are in a molten form if possible.

Low carb gummy bear

Water120g->->->
Allulose50g75g60g65g
Gelatine25g30g->35g
sour powder2g->->->
citric acid1g->->2g
flavor 11/4 tsp lemon->1/2 tsp rasp1/2 tsp tutti frutti
flavor 21/4 tsp orange->->
color 1red 1 drop->->->
color 2yellow 1 drop->->—-
stevia—-1/3 little spoon->->
sorbitol—-—-30g35g
gum arabic—-10g->->
waser was replaced with lemon + rasp tea

Mix all the dry ingredients together and add the near boiling hot water and the rest of the wet ingredients. May put in microwave if needed.

Pizza dough (biga or poolish)

Here is a Pizza Poolish and Biga recipe I’m using right now. This was heavily inspired by Vito Iacopelli and his YouTube videos and others. I do like the biga version better.

Total dough ingredients for 8×315g balls:
flour 100% (1500g)
water 65% (975g)
salt 3% (45g)
dry yeast, depending on the type (I use instant yeast) maybe more and additional handling required (2-4g)

Select to follow the Poolish or Biga instructions, but not both.

Poolish 24 to 48 h:
300g water
300g 00 flour
2g yeast

OR

Biga 24 to 48 h:
675 g water
1500g 00 flour
2g yeast

Combine all the poolish or biga ingredients (in case you don’t use instant yeast follow the yeast instructions and adjust the amount accordingly) let sit a few hours at room temp, keep for the rest of the time in the fridge. Especially with biga make sure not to form a gluten network yet. Let rest for 24 to 48 hours.

Poolish dough:
45g salt
675g water
1200g 00 flour
poolish
Combine all the salt with all the water first. Next, mix 600g flour in the water-salt mixture and let sit for 30 minutes. Add poolish to the dough and keep mixing and adding the remaining flour over a few minutes.

Biga dough:
45g salt
300g water
biga
2g yeast
Combine all the salt with all the water first. Mix salt water with biga adds yeast a bit later (in case you don’t use instant yeast follow the yeast instructions and adjust the amount accordingly (divide water into two portions, don’t mix yeast and salt directly in the same water together)).

Both: Run stand mixer for 15 to 20 min. Make a big dough ball on the table and let rest for 1h covered with plastic wrap at room temp. Portion out into 8 dough balls (if used later refrigerate), let rise for 2h with biga or 4 to 6 hours with poolish. When balls are refrigerated, let them come to room temp over 4 to 6 hours.

Tomato sauce:
1g salt per 100g San Marzano tomatoes
basil

Toppings for Pizza Margarita:
20g Parmesan cheese
100g Mozzarella cheese
3-5 basil leaves
Olive oil

Preparation in a home oven at 500 to 550 F:
315 g stretch to 12” – 14” (30 to 35cm) put on a pizza screen.
Add 5 to 6 oz (2x 3oz lades) tomato sauce.
1. Bake for 3 to 4 minutes or until done.
2. Add 100g cheese and Basil and olive oil and bake for another 6 to 8 minutes.

Preparation in Ooni Koda 16:
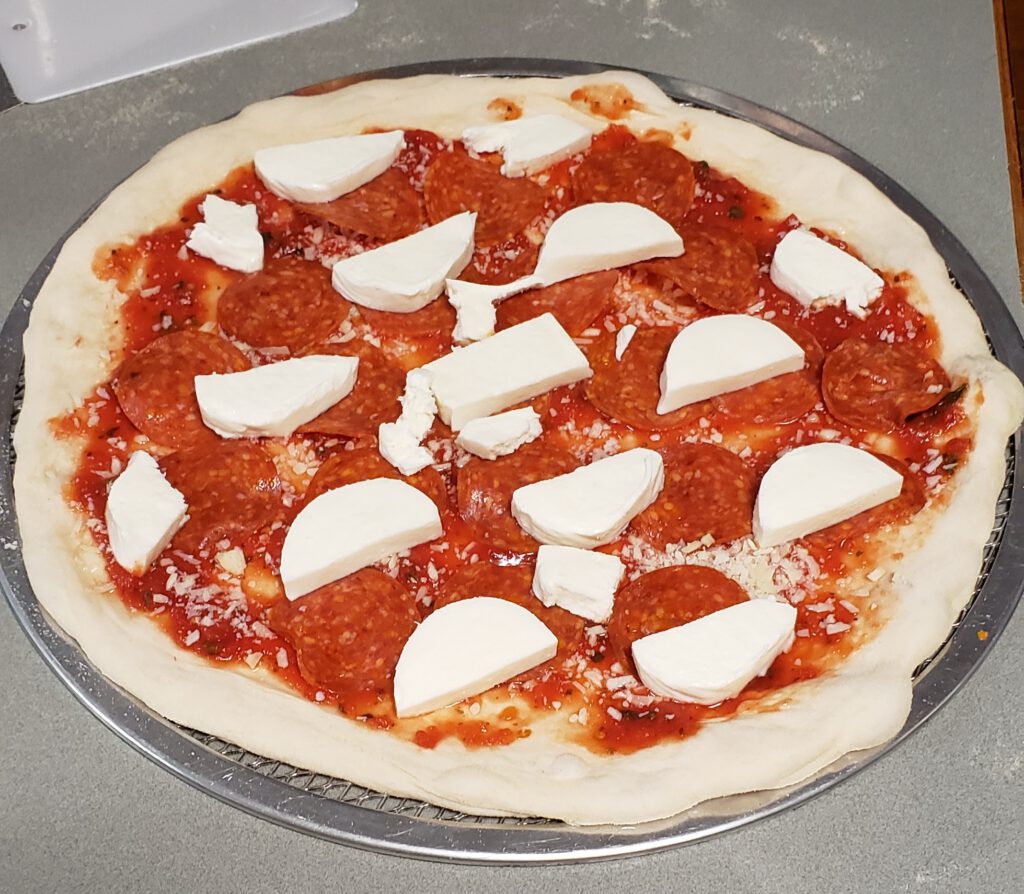
Stretch, add tomato sauce, basil leaves, parmesan cheese, mozzarella cheese, olive oil.
Bake at 430 C for 60 to 90 seconds or until done.

Pickled Eggs

  • 2 qt mason jar
  • 29 large hard boiled eggs
  • 240g water
  • 240g distilled vinegar
  • 60g salt
  • 20g erythritol
  • Bay leaf
  • Mustard seed
  • Coriander seed
  • Clove powder
  • Onion powder
  • Celery seed
  • red food color

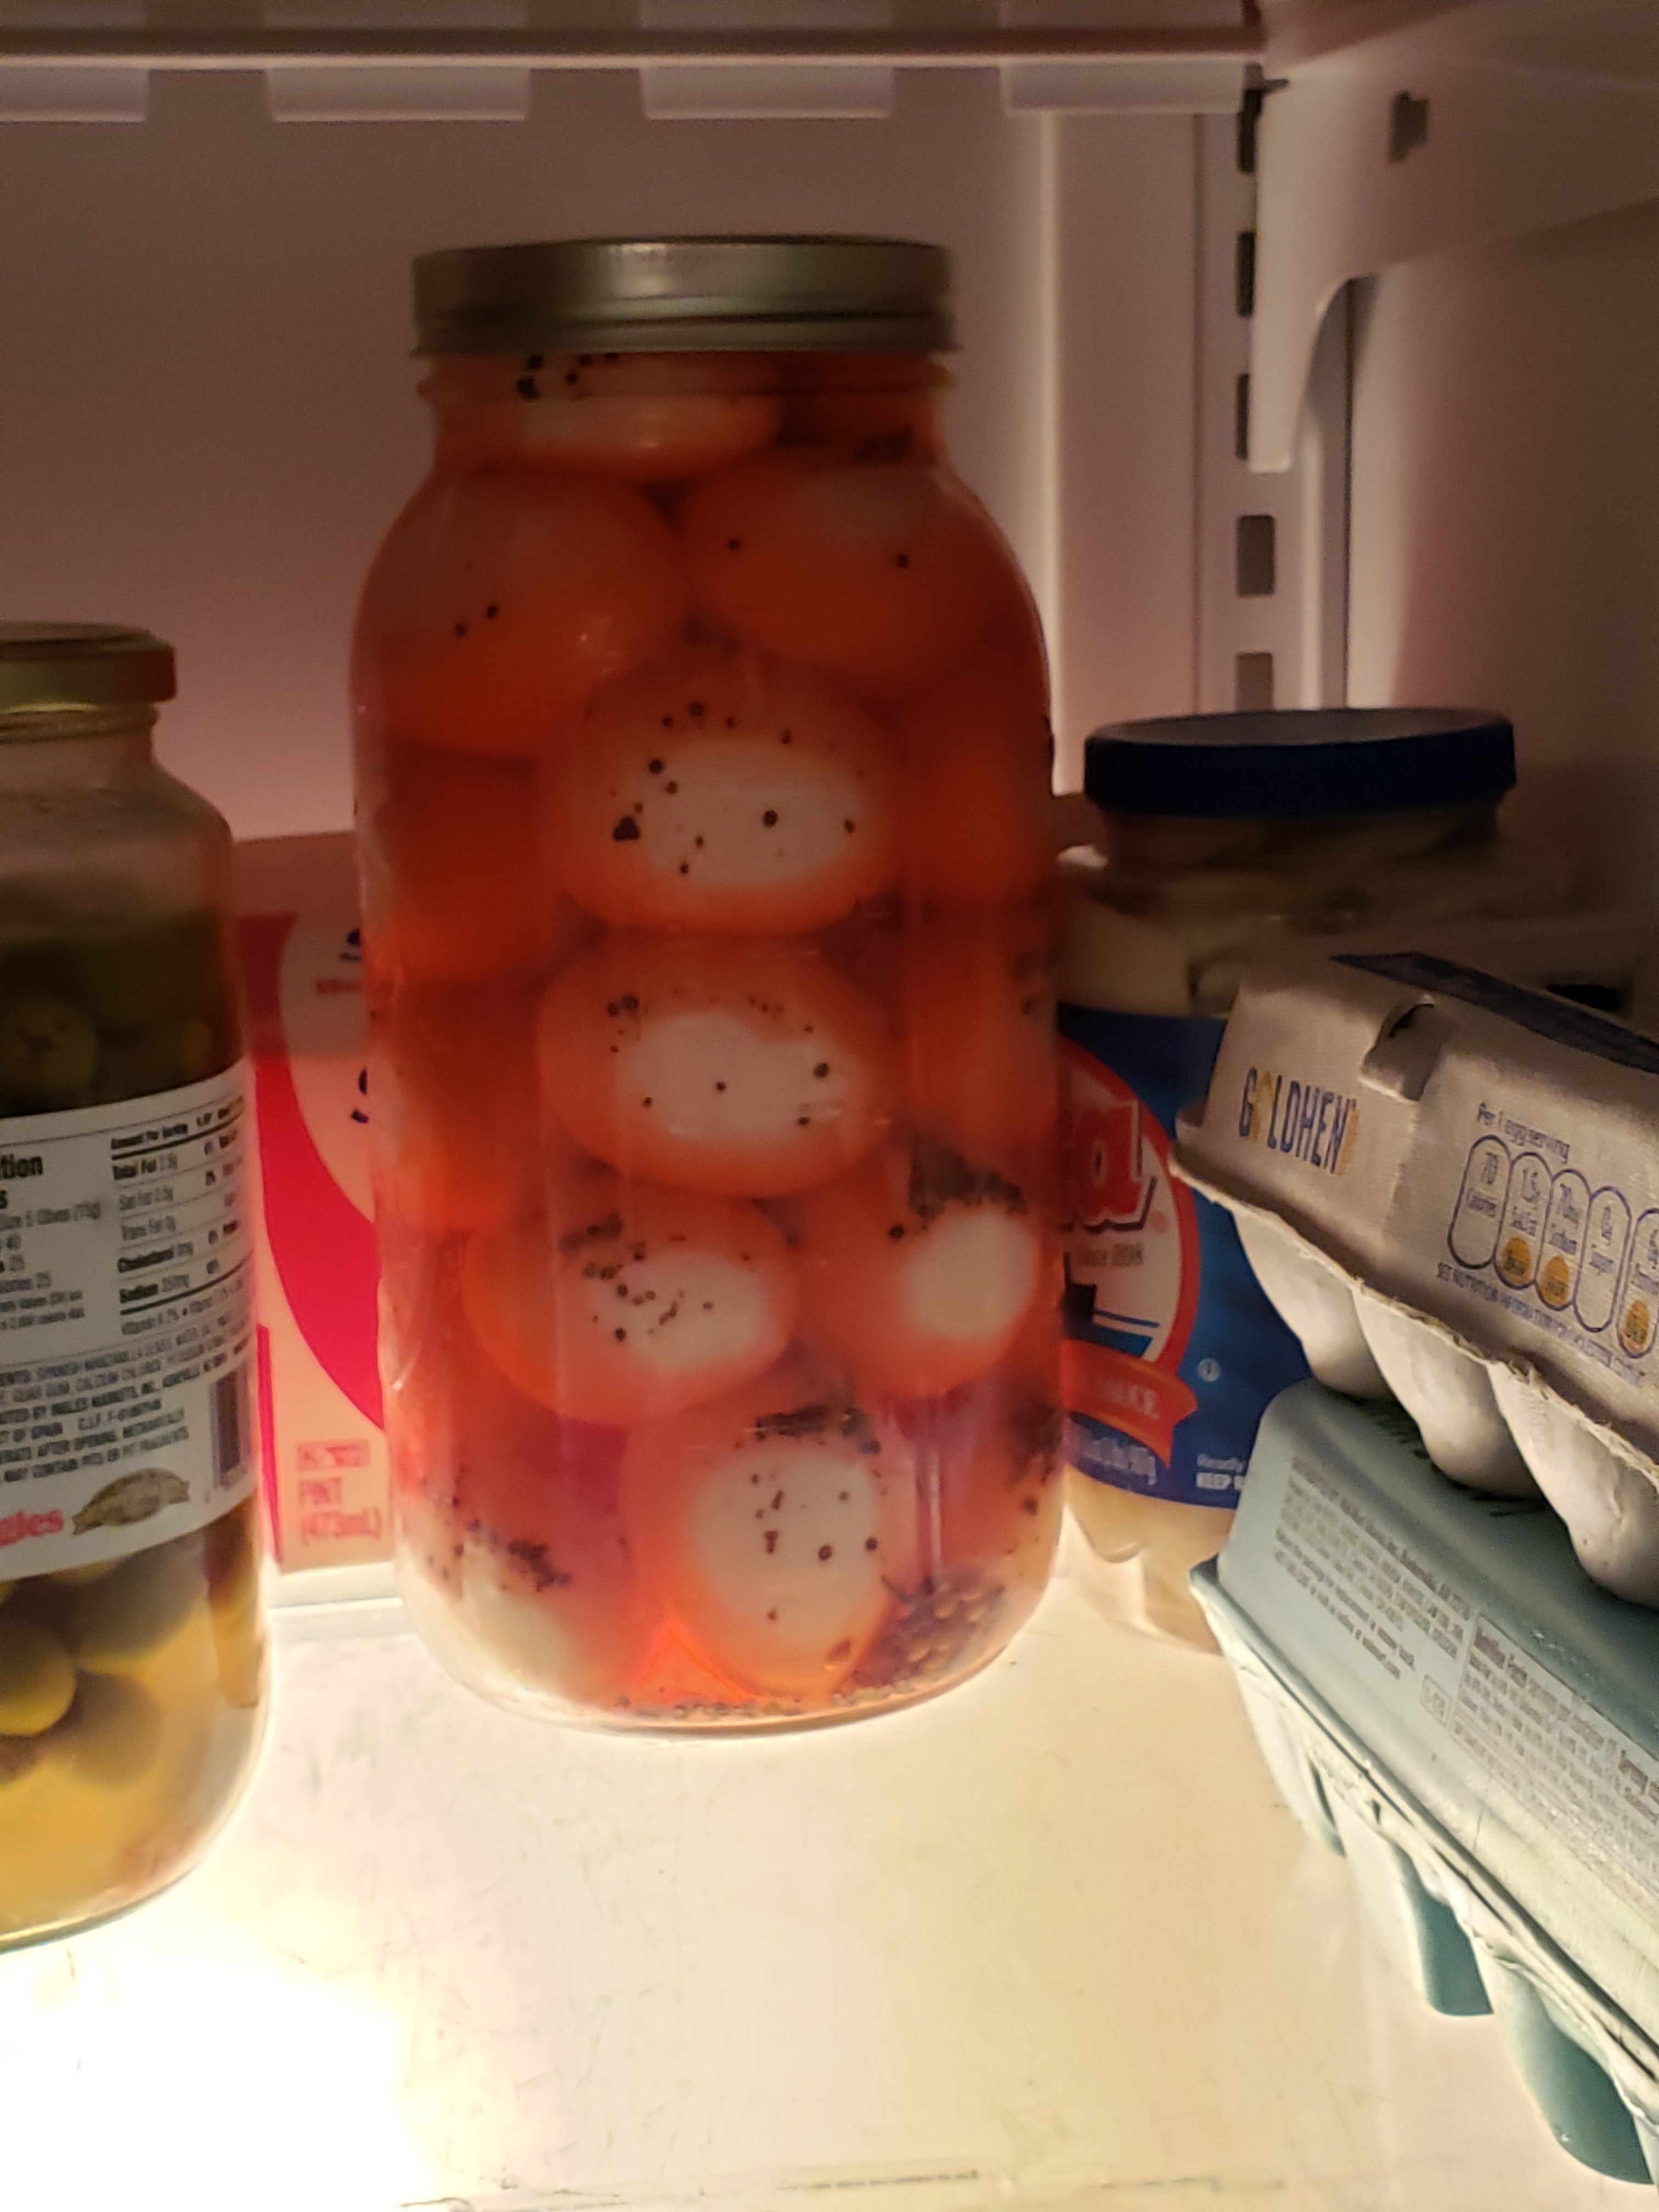
Hard boil eggs for 12 minutes. Cool down and peel eggs. In pot cook rest of the ingredients for few minutes. Pack eggs in jar and pour hot pickling solution over top. Add more equal parts water and vinegar to top off jar if needed. Store in fridge, taste improves with every day. Wait at least 12 hours, but 3 days is good and 1 week is even better.

Heringssalat ala Oma Luzie

Unfortunately the exact recipe is not longer known. My grandmother just mix this together without a written recipe. Because she lived in Germany I’m sure most of the ingredients were a little different, for example the used Herring. I’m not sure about the eggs, however I love food with eggs and some receipe I looked at had some. I know only for sure that she boiled the onions and used Miracle Whip had apples and pickles in the salad.

  • 32 oz Vita Herring
  • 1/2 small can Miracle Whip
  • 2 medium apple
  • Lemon juice
  • 1 medium red onion
  • 5 kosher dill pickle spares
  • 4 hardboiled egg
  • Celery
  • Salt
  • Pepper
  • Mustard
  • Dill

Wash the Herring and only use the fish pieces.

Cut everything else in small pieces. I added a little bit of lemon juice over the apple cubes to prevent discoloration.

Boil only the onion cubes in vinegar water.

Mix everything together.

Low Carb Taiyaki

Taiyaki is a filled Japanese pan cake. The traditional filling is red bean past. I’m sure this recipe will also work for standard American pan cakes and waffles. I guess it would be possible to make a low carb black soy bean past, but I had some low carb nutella on hand that needed to be used.

I ordered this pan: Amazon link.

I used this recipe as a starting point: source link.

The little filled pan cakes are very good tasting. The cake part reminds me a little bit of waffel house. As next step I would like to experiment with different fillings. I would like to try a lemon custard or a piece of chocolate next.

Ingredients

Batter:

  • 112g (4 oz) cream cheese, softened
  • 4 eggs
  • 10 g (2 tsp) vanilla extract
  • 15 g Erythritol
  • 18 g Carbalose
  • 18 g resistant wheat starch
  • 10g baking powder
  • 1 dash cinnamon
  • 4g (1 tsp) optonal Konjac Glucomannnan Powder for American pancakes

Filling:

  • 60g Low carb nutella

Instructions

  1. Mix all the ingredients in a blender.
  2. Heat up pan to 350 F (on my stovetop I set it on 3 (range is 1-9)). Put some oil in each mold and rub with paper towel.
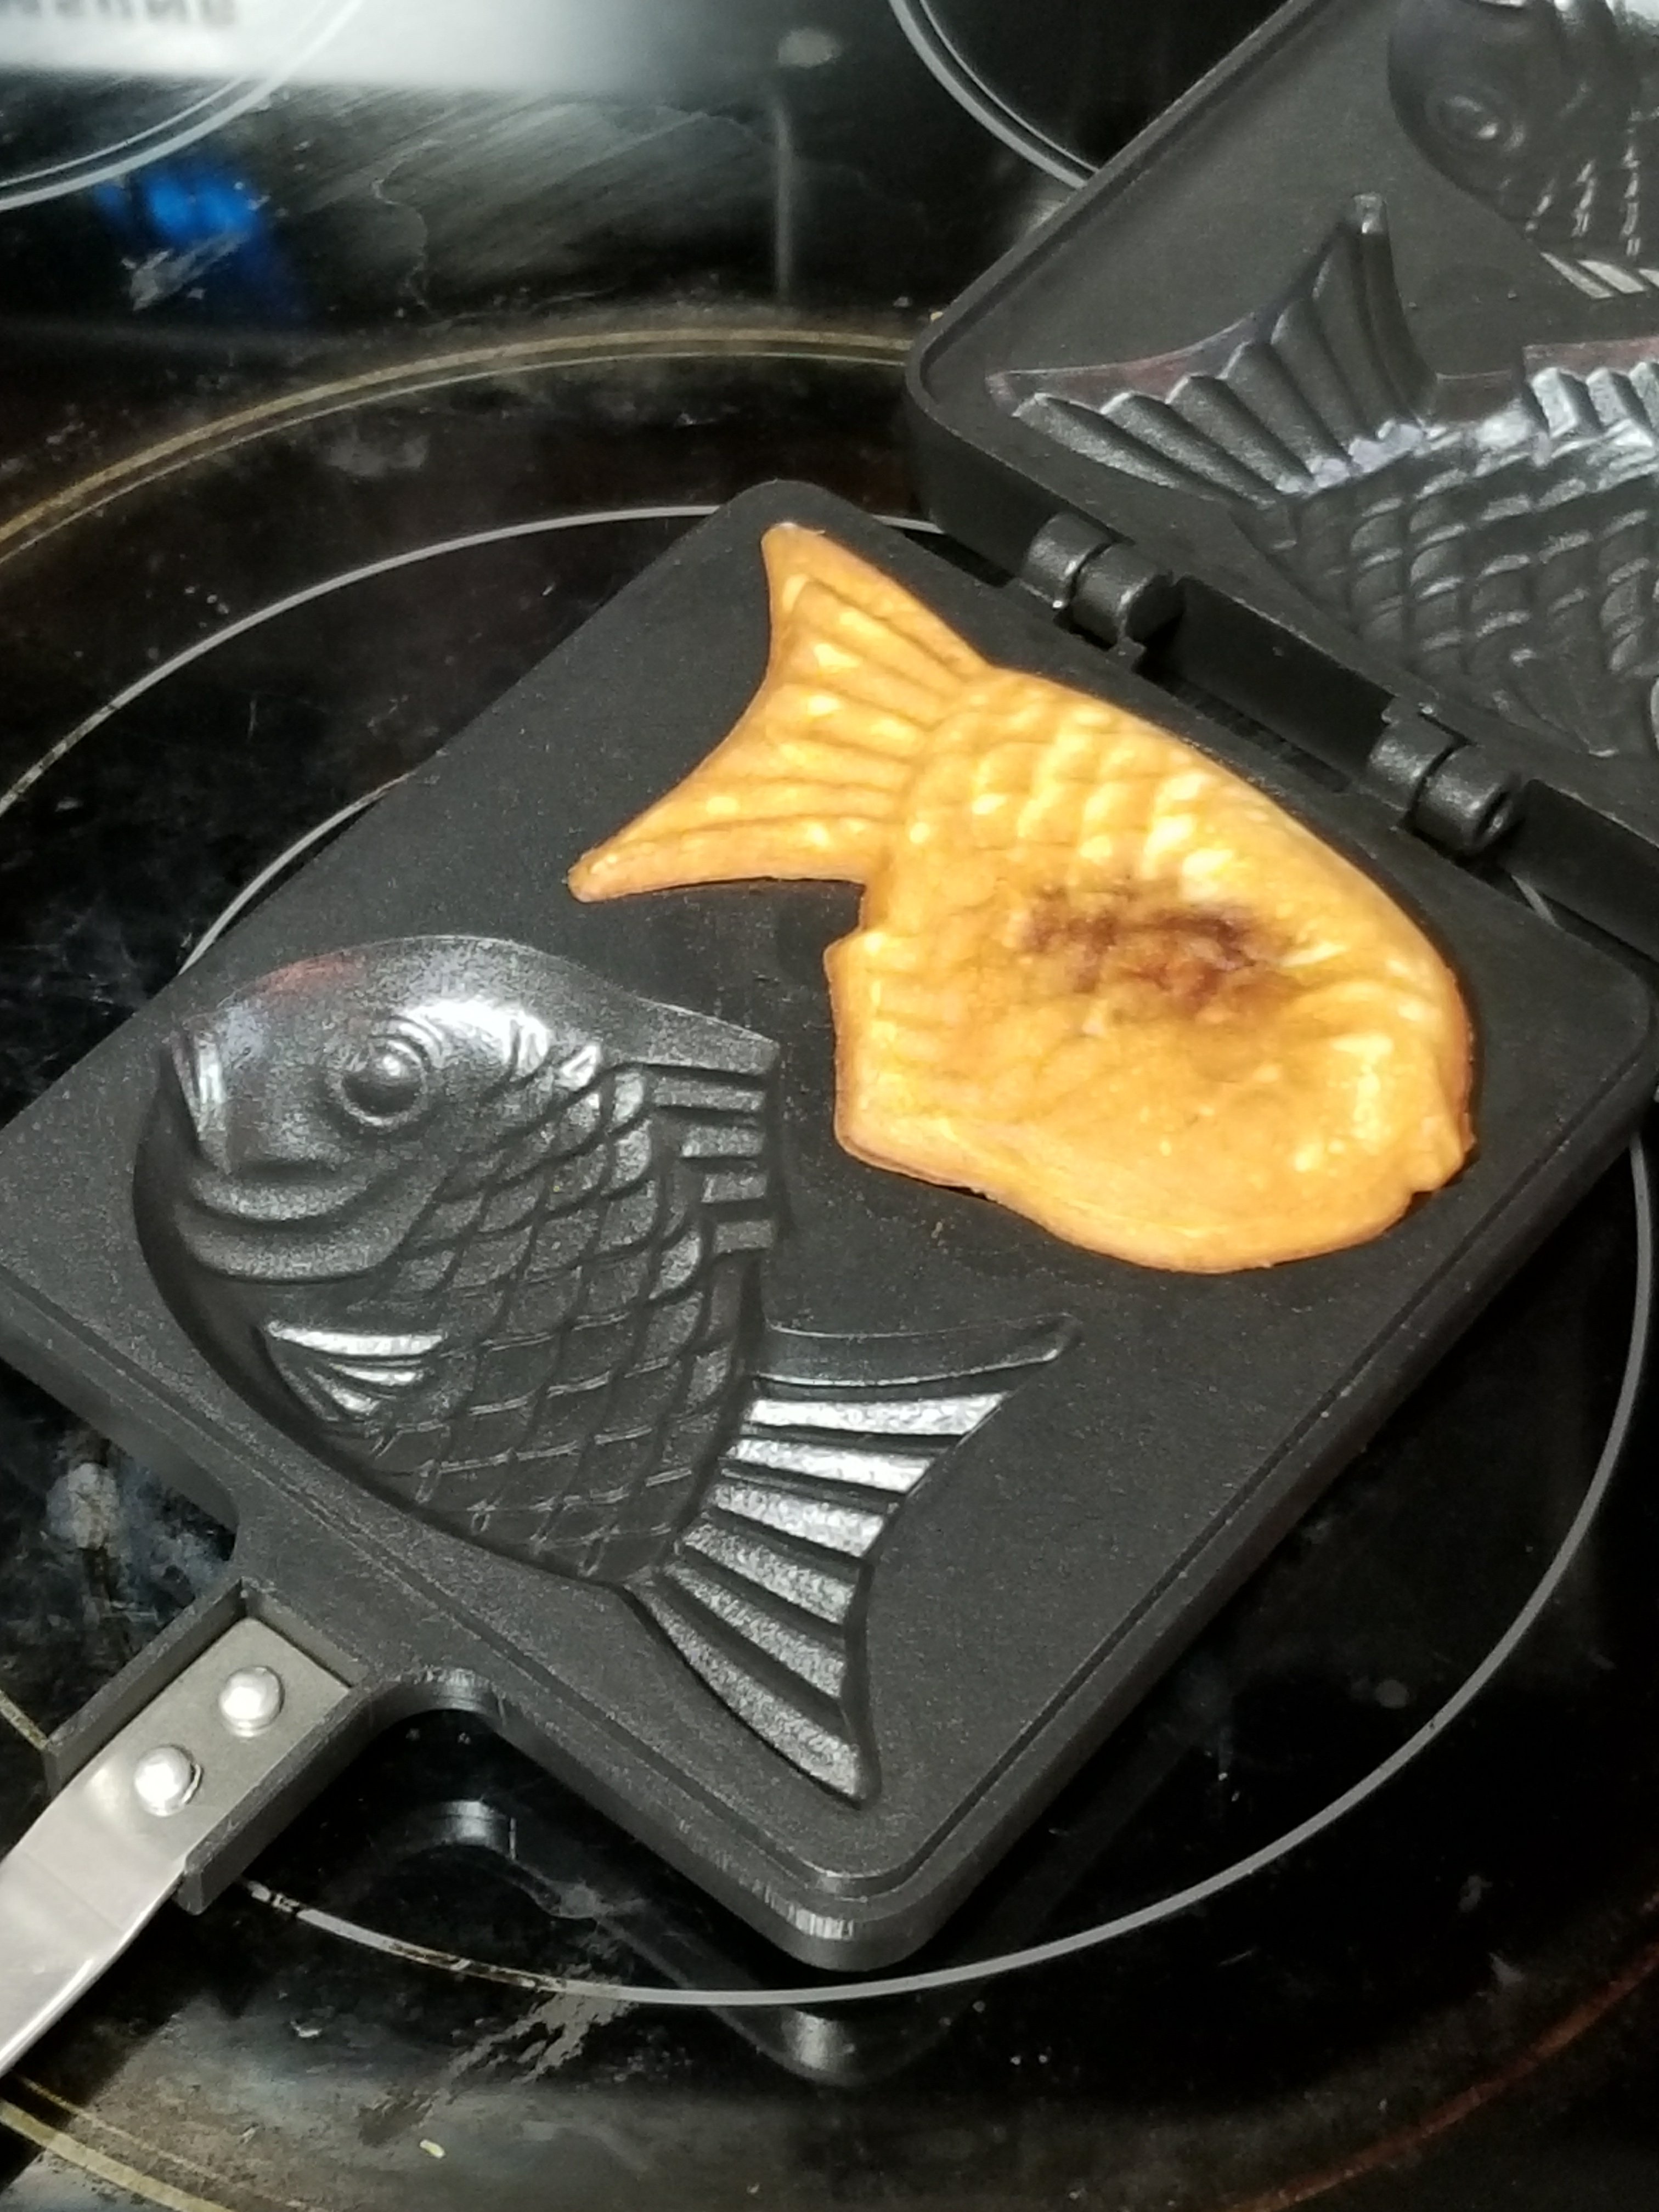
  3. Pour batter into the fish molds until it reaches the tail. Move mold around to fill the fin and tail.
  4. Drop some low carb filling in deepest part of each mold, I used 5 g low carb nutella per fish. Press down with finger until everything is covered with batter. If needed pour a little more batter over filling.
  5. Close the mold and flip it immediately, turn around so batter goes in all spaces. Let cook for 2 minutes. Flip back and let cook for 1 more minute.
  6. Remove Taiyaki from mold and repeat. This makes 6 batches or 12 fish for me.

Nutrition from MyFitnessPal

  • 70 calories
  • 2.3 g carbs, 1.6 g fiber, 0.7 g net carbs
  • 3.2 g protein
  • 5.1 g fat

Low Carb Spätzle aka German Keto Noodles/Keto Pasta

I found multiple recipes on the Internet that are very similar. But I was not happy about how the noodles were holding together. I experimented replacing coconut flour with other ingredients like psyllium husk or add more eggs. But in the end, wheat gluten worked the best. This brings this great recipe to a whole new level. But just like the original, I would suggest making it fresh or it may turn slimy. You want to get oat fiber that doesn’t taste rancid and is a white flour color. Don’t get oat flour or it is not longer low carb. For Spätzle I use a hand press like a potato ricer. For noodles or spaghetti, I use the Kitchen Aid pasta attachment.

Ingredients:
2 tbsp (18g) glucomannan powder
4 tbsp (24g) oat fiber
1 tbsp (12g) baking powder
1/2 tsp (3g) salt
1 tbsp (12g) wheat gluten
3/4 cup (180ml) water, hot
1 large egg

I heated the water for 1 minute in the microwave.

Add the egg and immediately the water and whisk vigorously and fast because it will pull together in seconds. Form a ball and place in your extruder to form the noodles. Press the noodles on a cutting board and let rest for 8 minutes. The glucomannan needs this time to stabilize.
Drop everything in nearly boiling water for 1 minute or shorter until done.
I use a frying spoon to move everything in cold water and then to a colander.

Nutrition Facts
Servings 2.0
Amount Per Serving
calories 65
% Daily Value *
Total Fat 3 g 4 %
Saturated Fat 1 g 4 %
Monounsaturated Fat 0 g
Polyunsaturated Fat 0 g
Trans Fat 0 g
Cholesterol 108 mg 36 %
Sodium 715 mg 30 %
Potassium 3 mg 0 %
Total Carbohydrate 16 g 5 %
Dietary Fiber 15 g 60 %
Sugars 0 g
Protein 7 g 13 %

Sous Vide temperatures and times I used.

This page just holds some of my sous vide things I tried.

The 13 minutes egg at 75 C was very good.

The “Top Sirloin Steak” sous vide at 132 F for 15 hours and finished off on the grills sear unit was very tender and good. Also very good after just 6 hours at 140 F.

The “chicken breast” sous vide at 144 F for 3 hours.

The “country ribs beef” sous vide at 150 F for 48 hours.

The “Pork Tenderloin” sous vide at 144F for 3 hours.

The “Pork Loin” sous vide at 140F for 5 hours.

Beef round roast at 140 F for 11 hours has a tender apprentice.

Pork ribs at 144 F for 48 hours. 

Seeed / 52Pi PiShow 2.8 device tree overlay

This post is about the PiShow 2.8″ Resistive Touch Display from Seeedstudio. I found this little 65K colors and 320×240 pixel touch display for $20 at one of there sales.

The documentation on there web page is not easy to understand and everything you need is already part of the standard operating system image.

I used some existing device tree overlay and merged them and changed the pins and adopted the settings from the seeed documentation.

The scree is showing the picture, the touch is working with my finger and the four buttons on the side are working too. I would call this a success.

Thanks to @notro for his guidance to make this example and his work in this area in general.

/*
 * Device Tree overlay for pishow 2.8
 *
 */

/dts-v1/;
/plugin/;

/ {
    compatible = "brcm,bcm2835", "brcm,bcm2708", "brcm,bcm2709";

    fragment@0 {
    target = <&spi0>;
    __overlay__ {
        status = "okay";

        spidev@0{
        status = "disabled";
        };

        spidev@1{
        status = "disabled";
        };
    };
    };

    fragment@1 {
    target = <&gpio>;
    __overlay__ {
        pishow_display_pins: pishow_display_pins {
        brcm,pins = <18 23 24 25>;
        brcm,function = <1 1 1 0>; /* out out out in */
        brcm,pull = <0>; /* none */
        };
            pishow_ts_pins: pishow_ts_pins {
        brcm,pins = <22>;
        brcm,function = <0>; /* in */
        };
        keypad_pins: keypad_pins {
        brcm,pins = <16 20 21 26>;
        brcm,function = <0>; /* in */
        brcm,pull = <1>; /* down */
        };
    };
    };

    fragment@2 {
    target = <&spi0>;
    __overlay__ {
        /* needed to avoid dtc warning */
        #address-cells = <1>;
        #size-cells = <0>;

        pishow28: pishow28@0{
        compatible = "ilitek,ili9341";
        reg = <0>;
        pinctrl-names = "default";
        pinctrl-0 = <&pishow_display_pins>,
                <&pishow_ts_pins>;

        spi-max-frequency = <32000000>;
        rotate = <270>;
        bgr;
        fps = <30>;
        buswidth = <8>;
        reset-gpios = <&gpio 23 0>;
        dc-gpios = <&gpio 24 0>;
        led-gpios = <&gpio 18 1>;
        debug = <0>;
        };

        pishow28_ts: pishow28_ts@1 {
        compatible = "ti,ads7846";
        reg = <1>;

        spi-max-frequency = <2000000>;
        interrupts = <22 2>; /* high-to-low edge triggered */
        interrupt-parent = <&gpio>;
        ti,keep-vref-on = <1>;
        pendown-gpio = <&gpio 22 0>;
        /* driver defaults */
        ti,x-min = /bits/ 16 <230>;
        ti,y-min = /bits/ 16 <200>;
        ti,x-max = /bits/ 16 <3900>;
        ti,y-max = /bits/ 16 <3700>;
        ti,pressure-min = /bits/ 16 <0>;
        ti,pressure-max = /bits/ 16 <0xFFFF>;
        ti,x-plate-ohms = /bits/ 16 <80>;
        ti,swap-xy = <1>;
        };
    };
    };
    fragment@3 {
    target-path = "/soc";
    __overlay__ {
        keypad: keypad {
        compatible = "gpio-keys";
        #address-cells = <1>;
        #size-cells = <0>;
        pinctrl-names = "default";
        pinctrl-0 = <&keypad_pins>;
        #status = "disabled";
        autorepeat;
        button@16 {
            label = "GPIO KEY_UP";
            linux,code = <103>;
            gpios = <&gpio 16 0>;
        };
        button@26 {
            label = "GPIO KEY_DOWN";
            linux,code = <108>;
            gpios = <&gpio 26 0>;
        };
        button@20 {
            label = "GPIO KEY_LEFT";
            linux,code = <105>;
            gpios = <&gpio 20 0>;
        };
        button@21 {
            label = "GPIO KEY_RIGHT";
            linux,code = <106>;
            gpios = <&gpio 21 0>;
        };
        };
    };
    };
    __overrides__ {
    speed =   <&pishow28>,"spi-max-frequency:0";
    rotate =  <&pishow28>,"rotate:0";
    fps =     <&pishow28>,"fps:0";
    debug =   <&pishow28>,"debug:0";
    swapxy =  <&pishow28_ts>,"ti,swap-xy;0";
    xmin =    <&pishow28_ts>,"ti,x-min;0";
    ymin =    <&pishow28_ts>,"ti,y-min;0";
    xmax =    <&pishow28_ts>,"ti,x-max;0";
    ymax =    <&pishow28_ts>,"ti,y-max;0";
    pmin =    <&pishow28_ts>,"ti,pressure-min;0";
    pmax =    <&pishow28_ts>,"ti,pressure-max;0";
    xohms =   <&pishow28_ts>,"ti,x-plate-ohms;0";
    #keypad =  <&keypad>,"status";
    };
};

I used this script to install the device tree compiler dtc. After the compiler was installed this command creates the dtbo file:

sudo dtc -@ -I dts -O dtb -o /boot/overlays/pishow28.dtbo pishow28.dts

The last step is to add “dtoverlay=pishow28” to the end of the “/boot/config.txt” file.

Plus the /etc/X11/xorg.conf.d/99-ads7846-cal.conf file that swaps the X and Y axis:

Section "InputClass"
    Identifier "Touchscreen"
    MatchProduct "ADS7846 Touchscreen"
    Option "InvertX" "1"
    Option "InvertY" "1"
    Option "SwapAxes" "0"
    Option "Calibration" "215 3800 129 3676"
EndSection

I also added one line in /etc/udev/rules.d/95-ads7846.rules file:

SUBSYSTEM=="input", KERNEL=="event[0-9]*", ATTRS{name}=="ADS7846*", SYMLINK+="input/touchscreen"

As an extra I did install the frame buffer copy tool to copy the main frame buffer to the new touch display frame buffer.